Overview
This tutorial explains how to setup and manage EmployeeBoost Users. An EmployeeBoost user is anyone who needs to log into the StudioCloud program.
Table of Contents
- Creating/Editing an EmployeeBoost User
- Setting an Employee's Schedule
- Setting the Commission Rate
- Getting a Calendar Link for a User
- Automatically Adding an Employee to an Invoice
- Removing Studiocloud Access for an Employee
- Virtual Employees
- Security Roles
- Scheduling Roles
- Timecard Tracking
- Contacting Employees from Studiocloud
How to Create or Edit an EmployeeBoost User
- Click on Cloud Services
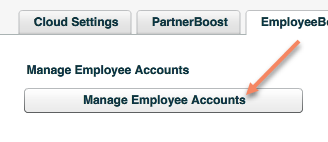
- Click on the EmployeeBoost tab
- Click on the Manage Employee Accounts button
-
- Click on the New User button or, alternatively, edit the desired employee
- Fill in the user information
- First and last name are required
- The employee email address is recommended so that the employee can receive CloudAlerts emails as well as password reset emails
- The employee cell phone is recommended so that the employee can receive CloudAlert text messages
- Click the Save button
How to set an Employees' Schedule
The Employee Hours are used in the following locations:
- It is used to show the hours on the scheduler with the orange background color
- It is used in the CloudBooking when booking an employee
- It is used in the scheduling wizard when scheduling an employee
- It is used in the create/edit event and session window under the "availability employees" list to see if the employee is available to scheduler.
- This option can be overridden so that it always shows the employee if the 'show all employees' option is selected
Here are the steps to customize it:
- Click on Cloud Services
- Click on the EmployeeBoost tab
- Click on the Manage Employee Accounts button
-
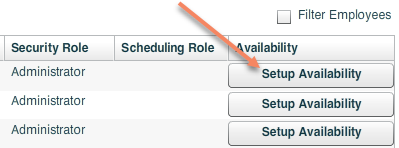
- Click on the Setup Availability button for the desired employee
-
How to set the Commission Rate for an Employee
To set the commission rate for an employee do the following:
-
- Create a new EmployeeBoost user or edit an existing EmployeeBoost user
- Enter the commission rate under the commission rate header
How to get a Calendar Link for an EmployeeBoost User
This option provides a link to the entire StudioCloud calendar that can be enabled or disabled for a specific employee:
- Edit an Existing EmployeeBoost User
- Click the Enable ICS Feed checkbox
- Click the Get ICS URL button
-
How to Have an Employee Automatically Added to an Invoice
If you want an employee to automatically be added to an invoice for commission tracking when they create an invoice, do the following:
-
- Create a new EmployeeBoost user or edit an existing EmployeeBoost user (see above)
- Click on the Settings tab
- Select the Add Employee to New Invoices checkbox
-
How to Remove Access to StudioCloud for an Employee
Option 1: Change the employees username, password, and email address
This option will keep the employee for historical purposes but will prevent the employee from logging in or access their login credentials.
- Click on the CloudServices component
- Click on the EmployeeBoost tab
- Click on the Manage Employee Accounts Button
-
- Edit the desired employee
- Change the username
- Change the password
- Change the email address of the employee
- Changing the email address will prevent the employee from having their login credentials emailed to themselves
Option 2: Change the employees security role to be a virtual employees
By converting the employee to a virtual employee you retain the virtual employee on file, but the employee does not count as a paid for employee. This allows you to archive the employee for historical purposes.
- Please note that a virtual employee can still clock in and clock out of the time card program and can still be assigned to resources. You can archive a virtual employee, which will remove them from the option of being assigned to resources.
Option 3: Delete the employee
This option will remove the employee. Any historical data will also be removed for that employee.
- Click on the CloudServices component
- Click on the EmployeeBoost tab
- Click on the Manage Employee Accounts Button
-
- Delete the desired employee
What is a Virtual Employee and how do I set Them up?
A StudioCloud virtual employee is a real-life person who can have access to your StudioCloud Calendar via an ICS feed, be added to appointments, sessions, events, and invoices.
What Information can a Virtual Employee Access?
A StudioCloud virtual employee has access to the following items:
- A virtual employee can view the calendar from a non-editable ICS feed on a third party calendar such as their smart phone, google calendars, or other calendar system
- A virtual employee can login to the mobile app but they can only access the timecard program in order to clock in/out. They do not have access to other mobile app features.
Why do I Need a Virtual Employee?
The StudioCloud EmployeeBoost add-on provides a StudioCloud account with a limited number of users that can be upgrade for a monthly fee. However, there are many businesses that have employees that never need to access the business management software but are involved in operating the business. Adding a virtual employee does not use any of the employee accounts you have purchased but it allows your employees to still be tracked using the timecard program and scheduled on the calendar.
How to add Virtual Employees
- Click on the Cloud Services component
- Click on the EmployeeBoost tab
- Click on the Manage Employee Accounts button
-
- Click the New User button or edit the desired EmployeeBoost user
- Select the Virtual Employee role in the Security Role drop-down box
- Enter the other pertinent information for this employee
- Click the Save button
What are Security Roles and how do I set Them up?
How to Create/Edit Security Roles
- Click The Cloud Services component
- Click the EmployeeBoost tab
- Click the Manage Security Roles button
-
- Create a new security role or edit an existing security role
- Click the Save button
How to Restrict an Employees Login to the Mobile App Based on Location
StudioCloud supports restricting where an employee can use the mobile app by limiting the locations they could use the mobile app to an approved list of comma separated IP addresses.
To add an IP address to a security role, create or edit a security role and select the checkbox next to the "Mobile Allowed IP Addresses" field. Then enter the desired comma separated IP addresses. To learn which IP address is yours, click on the What's My IP button and it will open a browser to show your IP address.
How to Add Security Role to an Employee
- Create a new employee or edit an existing employee
- Select the desired security role from the drop down box under the Security Role Information header
List of Available Security Roles
Below is a list of available security role options in StudioCloud. Each option supports either allowing the employee to either access or not access a resource.
- Client Security Role Options
- Employee can view clients
- Employee can access client reports
- Employee can access client settings
- Employee can change the client number
- Employee can create clients
- Employee can edit clients
- Employee can delete clients
- Employee can view clients modified by other employees
- Calendar Security Role Options
- Employee can view calendars
- Employee can access calendar reports
- Employee can access calendar settings
- Employee can create sessions, appointments and events
- Employee can edit sessions, appointments and events
- Employee can delete sessions, appointments and events
- Employee can drag and drop sessions, appointmments and events on the calendar
- Employee can view sessions created by other employees
- Point of Sale Security Role Options
- Employee can view invoices
- Employee can access point of sale reports
- Employee can access point of sale settings
- Employee can create invoicse
- Employee can edit invoices
- Employee can email invoices
- Employee can print invoices
- Employee can create estimates/quotes
- Employee can edit estimates/quotes
- Employee can delete estimates/quotes
- Employee can create payment plans
- Employee can edit payment plans
- Employee can delete payment plans
- Employee can create payments
- Employee can edit payments
- Employe can delete payments
- Employee can unlock invoices and payments
- Employee can enter a payment date that has already passed for a payment
- Employee can create a refund
- Employee can edit a refund
- Employee can delete a refund
- Employee can view estimates created by other employees
- Employee can view invoices created by other employees
- Employee can view payment plans created by other employees
- Employee can view payments created by other employees
- Project Management Security Role Options
- Employee can view jobs, projects, and tasks
- Employee can access project management reports
- Employee can access project management settings
- Employee can view projects and tasks assigned to other employees
- Bookkeeping Security Role Options
- Employee can access bookkeeping
- Employee can access bookkeeping reports
- Employee can access bookkeeping settings
- Cloud Services Security Role Options
- Employee can access Cloud Service settings
- Employee can access CloudForms
- Employee can access CloudBooking
- Employee can access CloudStorage
- Employee can access CloudProofing
- Employee can access CloudAlerts
- Mobile Security Options
- Employee can login to the mobile app
- Employee can access clients in the mobile app
- Employee can access the calendar in the mobile app
- Employee can access the point of sale in the mobile app
- Employee can access the project management in the mobile app
- Employee can access the time card in the mobile app
- Employee can access the bookkeeping
- StudioCloud Global Settings Security Role Options
- Employee can view the global settings
- Subscription Security Role Option
- Employee can update the StudioCloud subscription
What are Scheduling Roles and How Do I Set Them Up?
Scheduling roles are used to determine how an employee fits into an event. You can setup as many scheduling roles as you need for your business.
How to Create/Edit Scheduling Roles
- Click on the Cloud Services component
- Click on the EmployeeBoost tab
- Click the Manage Scheduling Roles button
-
- Create or edit a scheduling role
- Click the Save button
Add Scheduling Roles to an Employee
- Click on the Cloud Services component
- Click on the EmployeeBoost tab
- Click the Manage Employee Accounts button
-
- Create a new user of edit an existing user
- Click on the Scheduling Roles menu
- Click on the Add A Scheduling Role menu item
-
- Click the Select Scheduling Role button for the desired scheduling role
- Click the Save button
How to Track Employee Hours using Timecard Tracking
How to Manually Contact Employees by Email or Text Directly From Studiocloud
How to Open the "Contact Employees" Window
Click on chat dialogue icon in the bottom right of Studiocloud. It should look like icon in the image below:

Another method to open the same window is by doing the following steps:
- Click on the Actions menu at the bottom of the StudioCloud program
- Click on the Other menu option
- Click on the Contact Employees menu item
-
How to Contact a Single Employee
- After opening the Contact Employees Window, click on the Select Action menu next to the employee you wish to contact
- Select Email Employee or Test Message Employee
How to Contact Multiple Employees at Once
- After opening the Contact Employees Window, check the checkbox in the first column for each employees you want to contact
- If you want to contact all of the employees click on Group Operations menu followed by the Select All menu item
-
- If you want to contact all of the employees click on Group Operations menu followed by the Select All menu item
- Click on the Group Operations menu
- Click on either the Email Selected Employees menu item or the Text Message Selected Employees menu item depending on the method you want to communicate with them.
Other Ways of Communicating With Employees
StudioCloud supports a few other methods whereby you can communicate with employees. Here is a list of some of them:
- Select the employee in the notify tab of a client, session, event, appointment, job, project, or task.
- Have it set up in StudioCloud to auto-select an employee in the notify tab of a session, event, or appointment based on the calendar type that is used to schedule a session, event, or appointment
- Have it set up in StudioCloud to email or text message an employee when a pipeline stage is activated or marked completed.
- Have it set up in StudioCloud using CloudAlerts to have an employee automatically emailed or texted to remind them of sessions, appointments, or events.